Import a spreadsheet to add multiple cattle records to Breedr at once. This is the fastest way to get an existing herd into Breedr when you're starting out, or to add a large group of new arrivals.
Adding just a few animals? It's quicker to add them one at a time on the app. See Add Animals Mobile App.
Have an EID reader? Scan animals directly into Breedr using Chute Mode. See Get Started with Chute Mode.
What you'll need:
- A computer with access to app.breedr.tech (log in with the same email and password as the app)
- Your animal data in a CSV file, see Convert a Spreadsheet to CSV Format if you're working from Excel or Google Sheets
- The Breedr import template, download it in Step 1 below
Step 1: Download and fill in the template
- Download the Breedr Downloadable Animal Template
- Open it in Excel or Google Sheets.
- Fill in your animal data with one row per animal.
- Save or export the file as a CSV before uploading.
Using your own spreadsheet? You don't have to use the template! Breedr lets you map your own column headings to the right fields during upload (Step 4 below). Using the template just makes that step faster.
Required Fields:
Your file must include at least one animal ID and the following fields. Uploads will fail or produce errors without them.
|
Field |
What to enter |
|
Any Animal ID |
At minimum one of: Visual ID, Electronic ID, or Registered ID |
|
Sex |
male, female, steer, heifer, cow, or bull ; first letter only is also accepted (m, f, s, h, c, b) |
|
Estimated DOB |
Date of birth format: MM/DD/YYYY |
|
Date On Ranch |
Date the animal arrived on your ranch. Use the birth date if born on ranch |
|
Breed |
Breed name or code (see the full list of accepted breed codes) |
Optional fields
Include these columns if you have the data, all are optional and can be added later via Edit Animal Information or Upload Activities.
Identification
|
Field |
Notes |
|
Electronic ID (EID) |
15-digit ISO EID number |
|
Visual ID (VID) |
Ear tag number |
|
Registered ID |
Breed association registration number |
|
Alternative ID |
Any other identifier you use |
|
TSU Barcode |
Tissue Sampling Unit number |
|
UHF / RFID ID |
Ultra-high frequency tag ID |
|
Trich Tag |
Trichomoniasis test tag number |
|
Tattoo |
Tattoo identifier |
|
Brucellosis Tag |
Brucellosis vaccination tag number |
|
Secondary EID |
A second EID if the animal carries two tags |
|
Herddogg Tag |
Herddogg sensor tag ID |
Animal Details
|
Field |
Notes |
|
Name |
A name for the animal if you use one |
|
Face Pattern |
See accepted values: Face Patterns |
|
Hide Color |
See accepted values: Hide Colors |
|
Horn Status |
Enter Polled, Scurred, or Horned |
|
Is Twin |
Enter TRUE/FALSE |
|
Litter Size |
Number of animals in the litter |
Ranch & Origin
|
Field |
Notes |
|
Location |
Field, pen, or pasture on your ranch. Creates a new Location if the name doesn't already exist |
|
Source |
Where the animal came from, ranch or seller name. |
|
Purchase Price |
What you paid for the animal |
|
Purchase Date |
Date of purchase |
If adding new animals to a source or unit, must exist in contacts before we add any animals. See Set up Address Book and Contacts for more information.
Breeding & Birth
|
Field |
Notes |
|
Sire ID |
ID of the animal's sire. |
|
Dam ID |
ID of the animal's dam. |
|
Surrogate Dam ID |
ID of a surrogate dam if applicable |
|
Service Type |
natural service, artificial insemination, or embryo transfer |
|
Embryo Straw ID |
Straw ID for embryo transfer records |
|
Embryo Cane ID |
Cane ID for embryo transfer records |
|
Birth Weight |
Weight at birth |
|
Calving Ease |
Calving ease score |
|
Calf Vigor |
Vigor score at birth |
Sire and Dam must exist in Breedr before adding ID to animals: See Add a Sire for more information.
Arrival
|
Field |
Notes |
|
Arrival Weight |
Weight on arrival to the ranch |
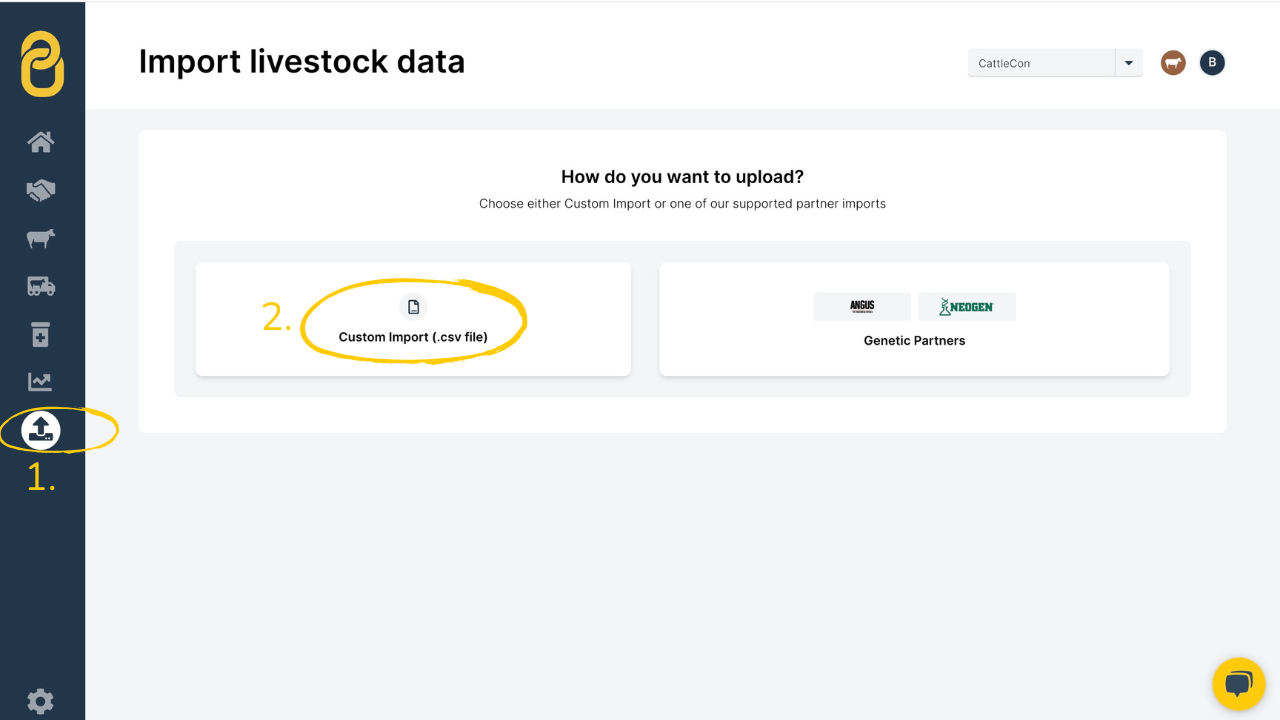
Step 2: Go to Import Data on the browser portal
- Log in at app.breedr.tech.
- From the left-hand navigation, select "Import."
Select the "Custom Import" icon.
3. Select 'Add Animals'.
%20(2)-1.png?hsLang=en)
4. Select your .csv file from your computer and then press 'Next.'
-1.png?width=670&height=377&name=Brinns%20Copy%20of%20How%20to%20log%20an%20activity%20%20(YouTube%20Thumbnail)-1.png)
5. Each column from your spreadsheet will match a drop-down menu. Match the fields you would like to upload using the drop-down menu. Double check the auto matched columns that it is filling in the data in the right spot.

6. Once all columns are matched, click 'Finish upload.' When the screen turns green, the upload has been successful. If there is an error, be sure to download the un-imported animals.

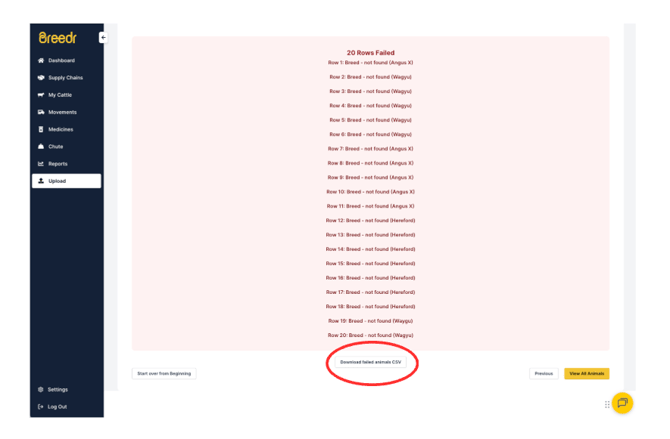
If Your Upload has Errors:
If any rows fail to import, Breedr will show an error screen. Do not close the window without downloading your error file first.
- Click "Download un-imported animals" to save a CSV of the rows that failed.
- Open the file and check the error column (common causes are listed below).
- Fix the errors in your spreadsheet and re-upload only the failed rows.
Common Upload Errors and How to Fix Them:
|
Error |
Likely cause |
Fix |
|
Invalid breed |
Breed name not recognised |
Check against the accepted breed code list and update |
|
Duplicate ID |
An animal with the same EID or VID already exists in your account |
Check your existing records; if it's a genuine new animal, use a different ID |
|
Invalid sex value |
Sex field contains an unrecognised value |
Use: male, female, steer, heifer, cow, bull (or first letter) |
|
Invalid date format |
Date not in MM/DD/YYYY format |
Reformat all date columns to MM/DD/YYYY |
|
Missing required field |
One of the required fields is blank |
Fill in Sex, Estimated DOB, Date on Ranch, and Breed for every row |
|
Invalid EID format |
EID is not 15 digits or has extra spaces |
Check for spaces in the EID column (see Recommended Settings for Equipment if EIDs were scanned in with spaces) |
Uploading activity or performance data?
The file import only adds animal records. To upload weights, pregnancy checks, treatments, or other activities, use the Activities importer. See Upload Activities - Web.
Need some help?
Use the chat window, call our Customer Success team at (737) 412-3131 , or email support supportusa@breedr.co