Learn how to bulk upload your animal data on the web portal
Whether you’re transitioning from another software, spreadsheets, or paper records, our file upload feature simplifies the process.
Why Use File Upload?
File uploads allow you to quickly add or update multiple animals at once, saving you time and ensuring your data is organized.
If you are adding an animal for the first time, and you are using EIDs for your animals, the quickest way is to scan EIDs in Chute Mode.
The Breedr web portal provides bulk uploads and the ability to download all of your animals, add activities, and view reports. Log in using the same username and password as the mobile app. If you would like to upload all your animals in bulk to the web platform, use this link for an Upload Template to fill with your animal data and save it as a CSV file before you upload.
Note: Your data must be in CSV format. For help converting files, see this guide.
Required fields are a unique Animal ID (usually a visual tag or EID) and Animal breed (Breed code).
You can use Visual id, Electronic id, Registered id, Breedr id, or any unique animal id to upload animals and corresponding activities. (The Breedr ID is generated automatically, but after animals are uploaded you can use it to upload animal activities).
How to Upload Animals:
Step-by-step
1. Download this template, fill it in, and save it as a CSV file.
The fields marked with an asterisk are required, so when formatting your data, make sure you have columns with the primary animal ID number you use (which can be Visual ID). Animal breed is not marked with an asterisk but it is required for a successful upload.
-
*Unique Animal ID = Any unique identifier, VID, EID, Registered ID
-
*Breed = Add your animal breed here; i.e Red Angus [AR]
Other information you can upload:
-
Additional IDs = match the ID you want to by your primary identifier, and add additional IDs
-
Sex = Male / Female
-
Is Castrated = Yes / No (determines if a steer or bull; for males only)
-
Is Birthed = Yes / No (determines if a heifer or a cow; for females only)
-
DOB = Date of birth
-
Date on Farm = Date the animal arrived on your farm
-
Group = Any specific internal group this animal is part of i.e, Young Calves / Steers for Sale, etc.
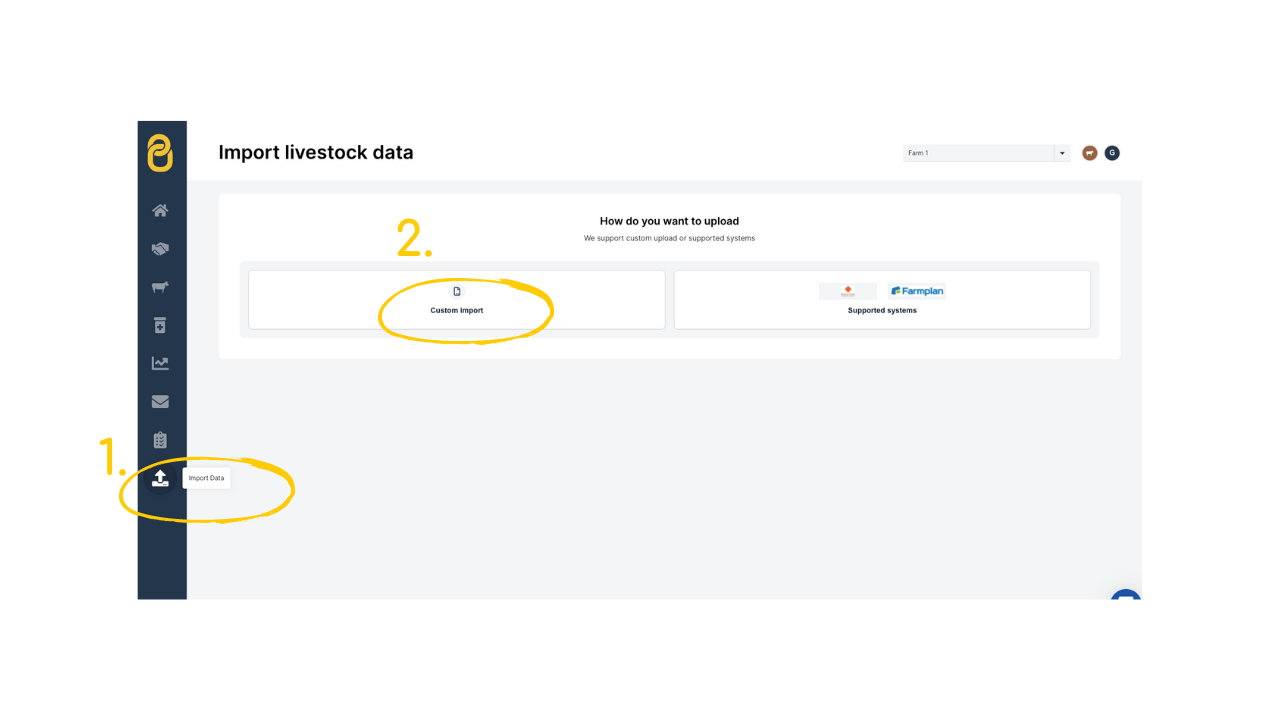
2. Go to 'Import data' on the web app and press the 'Custom import' icon.

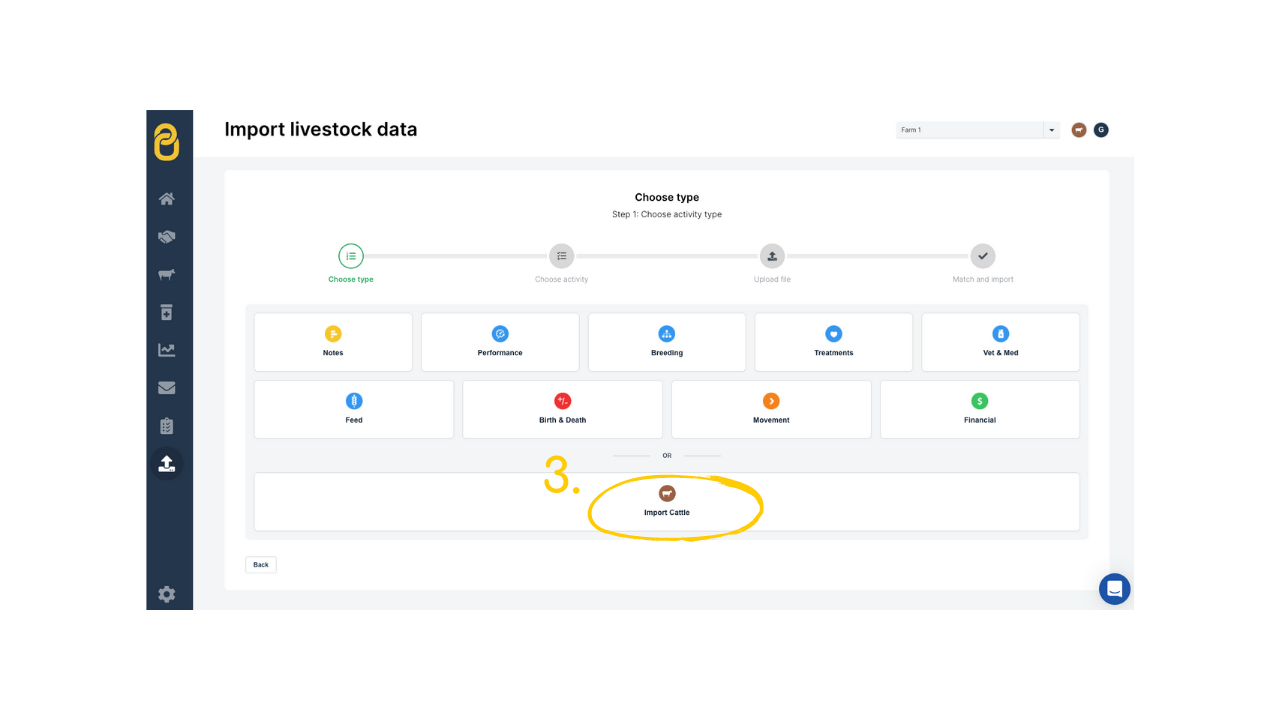
3. Select 'Import cattle' and press 'Next.'

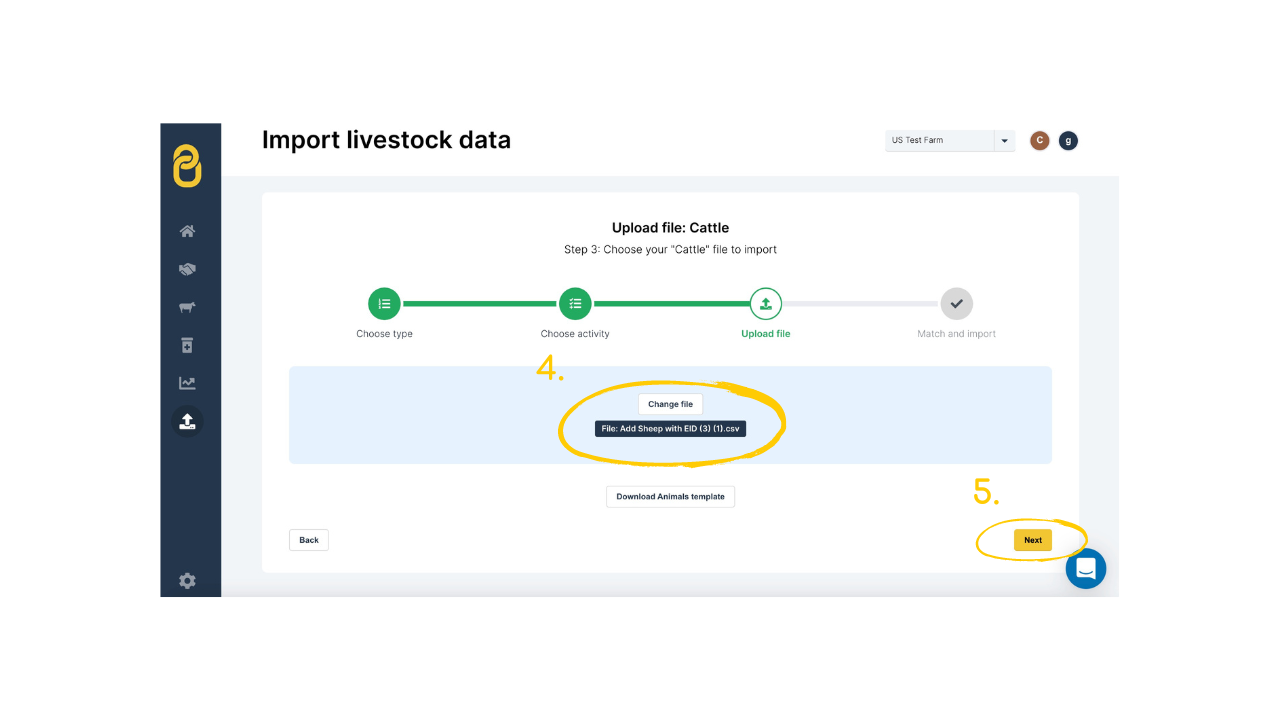
4. Select your file from your computer and then press 'Next.'

5. Each column from your spreadsheet will match a drop-down menu. Match the fields you would like to upload using the drop-down menu. You can press 'Match columns' which will fill in recognized headings for you, or you can set them manually.
If you are creating animals for the first time, make sure the 'Allow Create' box is checked.
If you wish to update animals that are already in your account, check 'Allow Edit.'
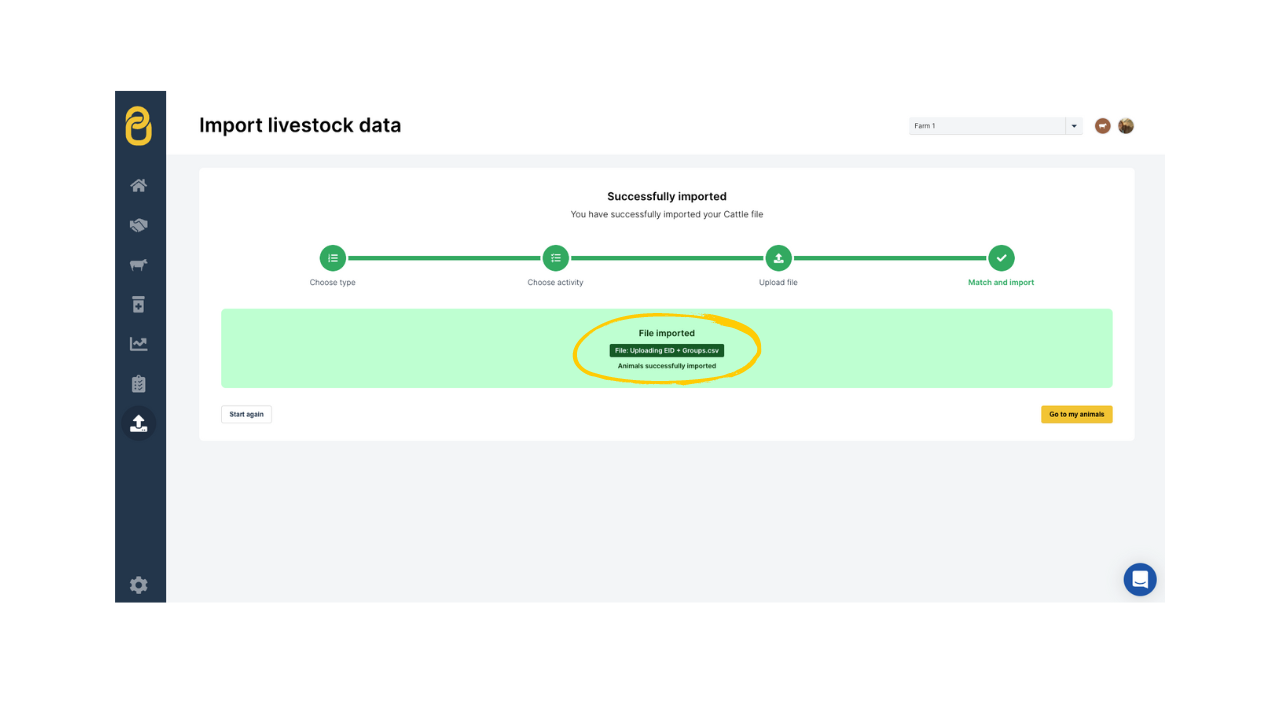
6. Once all columns are matched, click 'Finish upload.' When the screen turns green, the upload has been successful. If there is an error, be sure to download the un-imported animals.

To add additional information in an upload, match ID numbers and the column heading in your file. To upload performance, weights, or other activity information, see this guide.
Note: If you do not specify the sex of your animals, they will all be uploaded as heifers.
Need some help?
Use the chat window, call our Customer Success team at +1 (833) 980-1926, or email support supportusa@breedr.co
